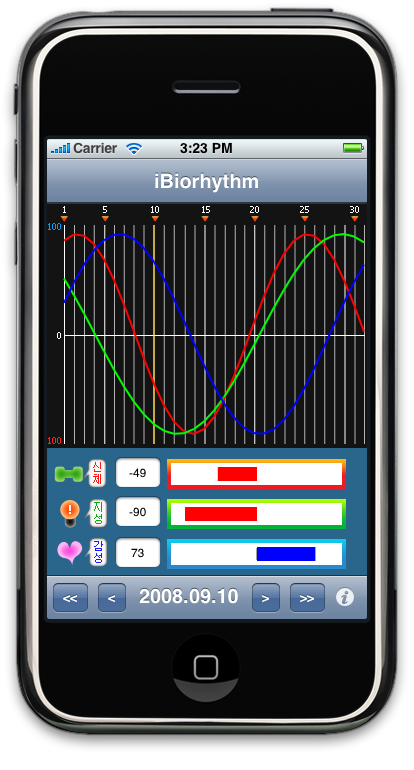
간단하게 아이폰용 바이오리듬 어플리케이션을 만들어 보겠습니다. 저도 처음 아이폰 SDK를 사용하여 만들어 보았기 때문에, 과정을 가능한 상세하게 설명할려고 합니다. 바이오리듬은
이전에 데쉬보드 위젯에서의 방식을 사용 하였습니다. 역시나 제대로 된 방법인지는 잘 모르겠습니다.
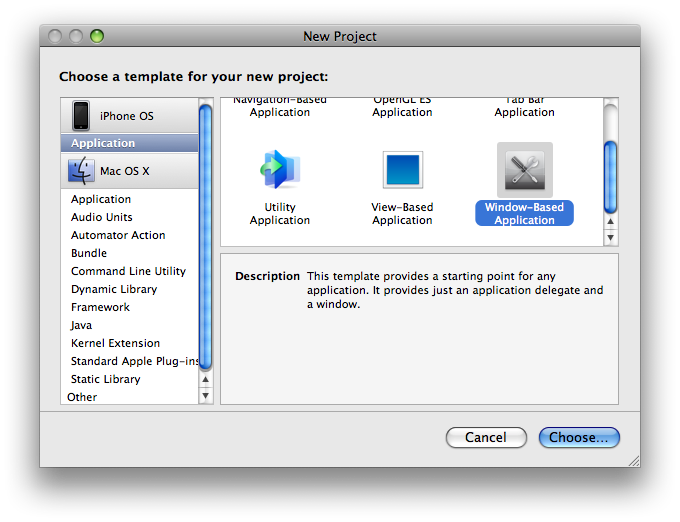
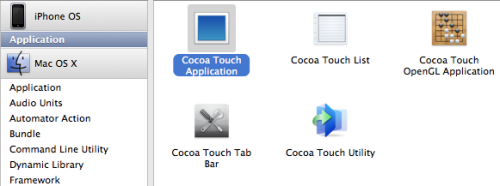
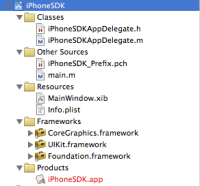
1. 프로젝트 생성Xcode를 실행하여 파일 메뉴에서 New Project를 클릭합니다. iPhone OS의 Application 항목에서 가장 마지막에 있는 'Window-Based Application'을 선택한 후 Choose... 버튼을 클릭합니다.
프로젝트명을 'iBio'로 입력하고 Save 버튼을 클릭합니다.
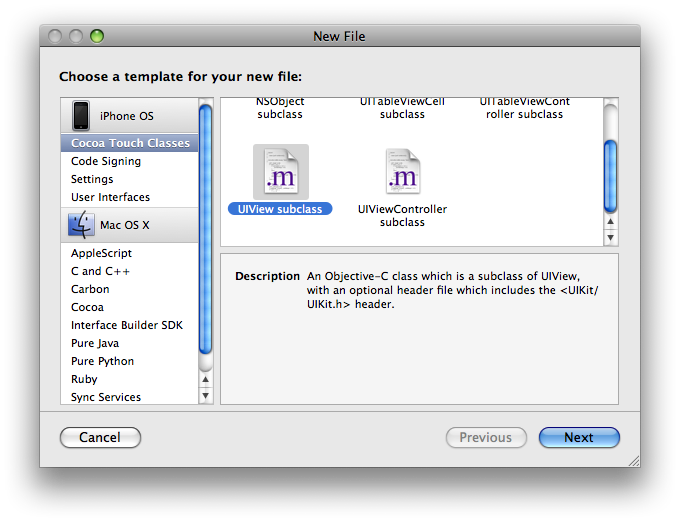
2. iBioView1) 클래스생성바이오리듬을 막대그래프 형식으로 보여줄 View 클래스를 만들어 보겠습니다. 메뉴에서 파일/New File...(또는 단축키: ⌘+N)을 클릭합니다. IPhone OS/Cocoa Touch Classes를 클릭하고 아래와 같이 UIView subclass를 선택한 다음 Next 버튼을 클릭합니다.
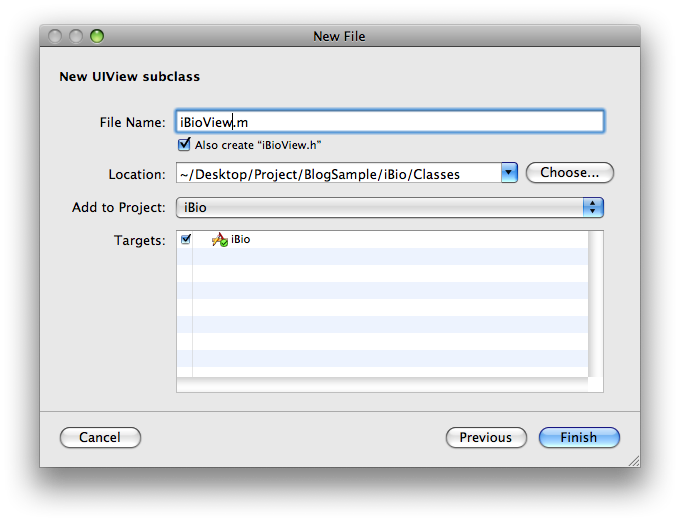
다음 창에서 아래와 같이 File Name에 iBioView.m을 입력한 후에 Finish 버튼을 클릭합니다.
2) iBioView.hiBioView.h 파일에 아래와 같이 내용을 추가 합니다.
#import <UIKit/UIKit.h>
#define MAX_DATATYPE 3
@interface iBioView : UIView {
double bioData[MAX_DATATYPE];
}
- (void)showBioData: (double)days;
- (int)getBioDataAt: (int)index;
@end
MAX_DATATYPE은 바이오리듬 항목을 의미하며, 신체/지성/감성 등 3개의 항목을 가지고 있습니다. bioData에는 각 항목별로 오늘의 바이오리듬 값이 저장됩니다.
3) iBioView.miBioView.m 파일에 아래와 같이 내용을 추가 합니다. 설명은 소스내의 간단한 주석으로 대신하겠습니다.
#import "iBioView.h"
@implementation iBioView
- (id)initWithFrame:(CGRect)frame {
if (self = [super initWithFrame:frame]) {
/* 바이오리듬 값을 0으로 초기화 */
for (int i = 0; i < MAX_DATATYPE; i++) {
bioData[i] = 0.0; }
}
return self;
}
- (void)drawRect:(CGRect)rect {
CGContextRef context = UIGraphicsGetCurrentContext(); /* 세개의 바이오리듬 값 막대 출력 */ for (int i = 0; i < MAX_DATATYPE; i++) { CGContextBeginPath(context); CGContextSetLineWidth(context, 15.0); int y = 34 + (i * 40); /* 바이오리듬 값이 0보다 작으면 붉은 색으로 크면 파란색으로 표시 */
if (bioData[i] > 0)
CGContextSetRGBStrokeColor(context, 0.0, 0.0, 1.0, 1.0);
else
CGContextSetRGBStrokeColor(context, 1.0, 0.0, 0.0, 1.0);
/* 선을 그린다 */
CGContextMoveToPoint(context, 200, y);
CGContextAddLineToPoint(context, 200 + (bioData[i] * 80/100) , y);
CGContextStrokePath(context);
}
}
- (void)dealloc {
[super dealloc];
}
- (void)showBioData: (double)days {
static const double s_values[MAX_DATATYPE] = {
23.0, 28.0, 33.0
};
/* 각 바이오리듬 설정 */
for (int i = 0; i < MAX_DATATYPE; i++) {
bioData[i] = sin((days/s_values[i]) * 2 * 3.14195) * 100;
}
/* 변경된 값으로 view가 다시 그려지도록 한다 */
[self setNeedsDisplay];
}
- (int)getBioDataAt: (int)index {
return (int)bioData[index];
}
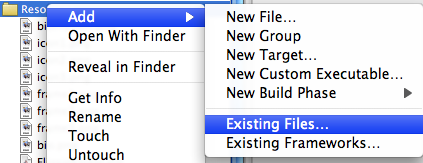
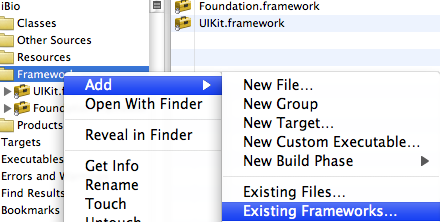
CGContextBeginPath와 같이 코어그래픽스 프레임워크의 모듈을 사용하기 위해 해당 프레임워크를 추가해야 합니다. 아래와 같이 Xcode 좌측의 Frameworks에서 마우스를 우클릭하여 Add/Existing Frameworks... 메뉴를 선택합니다.
선택창이 열리면 /Developer/Platforms/iPhoneOS.platform/Developer/SDKs/iPhoneOS2.0.sdk/System/Library/Frameworks 디렉토리에서 /CoreGraphics.framework를 선택합니다.
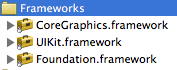
* 확인
완료되면 좌측과 같이 CoreGraphics.framework가 추가되어 있는 것을 확인할 수 있습니다.
3. iBioAppDelegate 변경1) iBioAppDelegate.hiBioAppDelegate.h 파일에 아래의 내용을 추가합니다. 추가된 항목은 인터페이스 빌더에서 각각의 오브젝트와 액션으로 연결됩니다.
#import <UIKit/UIKit.h>
@class iBioViewController;
@class iBioView;
@interface iBioAppDelegate : NSObject <UIApplicationDelegate> {
IBOutlet UIWindow *window;
IBOutlet iBioView *view;
IBOutlet UIDatePicker *datePicker;
IBOutlet UITextField *text_1;
IBOutlet UITextField *text_2;
IBOutlet UITextField *text_3;
}
@property (nonatomic, retain) UIWindow *window;
- (IBAction) viewButtonClicked:(id)sender;
@end
2) iBioAppDelegate.miBioAppDelegate.m 파일에 아래의 내용을 추가합니다.
#import "iBioAppDelegate.h"
#import "iBioView.h"
@implementation iBioAppDelegate
@synthesize window;
- (void)applicationDidFinishLaunching:(UIApplication *)application {
// Override point for customization after app launch
[window makeKeyAndVisible];
}
- (void)dealloc {
[window release];
[super dealloc];
}
/* 사용자가 보기 버튼을 클릭시에 메시지를 받는 메소드 */
- (IBAction)viewButtonClicked:(id)sender {
/* 사용자가 DatePicker에서 입력한 생일과 현재 날짜로 부터 차이를 구함 */
NSTimeInterval ti = [[datePicker date] timeIntervalSinceNow];
double days = ceil(fabs(ti) / (24 * 60 * 60));
/* view에서 days를 기준으로 바이오리듬을 구하고 출력되도록 한다 */
[view showBioData: days];
/* 각 텍스트필드에 새로 계산된 바이오리듬 값으로 설정 */
[text_1 setText: [NSString stringWithFormat: @"%d", [view getBioDataAt:0]]];
[text_2 setText: [NSString stringWithFormat: @"%d", [view getBioDataAt:1]]];
[text_3 setText: [NSString stringWithFormat: @"%d", [view getBioDataAt:2]]];
}
@end
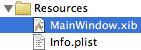
* 인터페이스 빌더 오픈
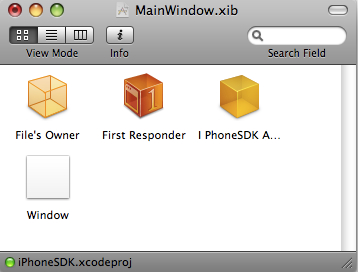
변경된 모든 파일들을 저장하고 좌측과 같이 MainWindow.xib를 더블클릭하여 인터페이스 빌더를 실행합니다.
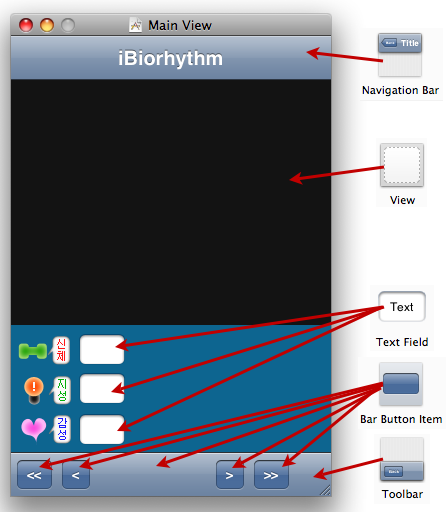
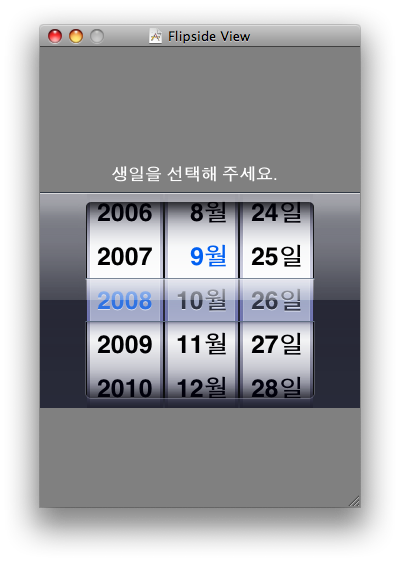
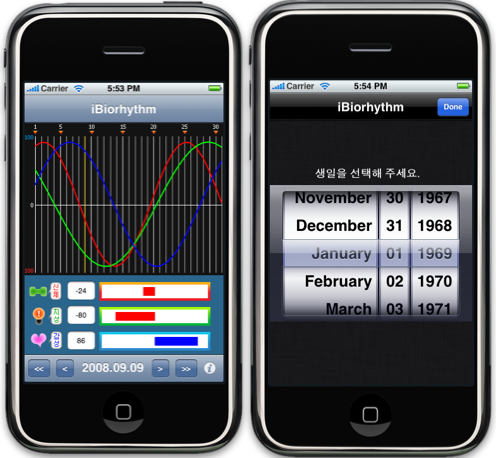
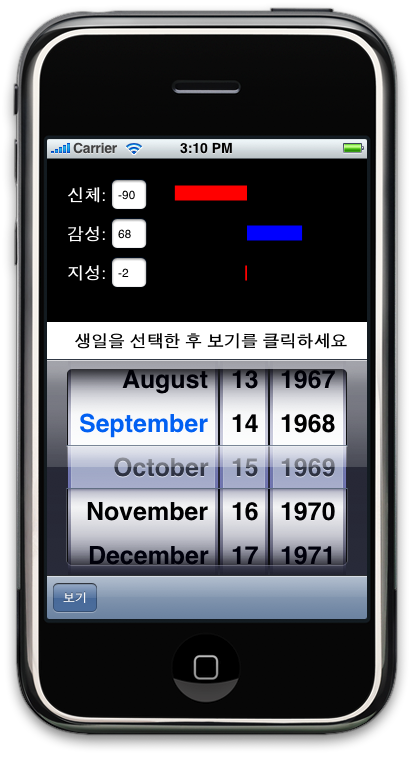
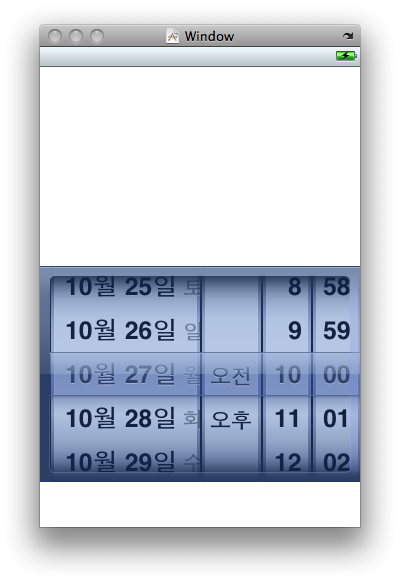
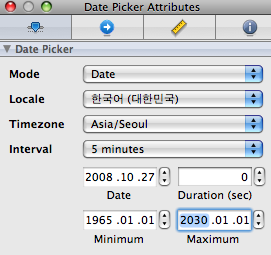
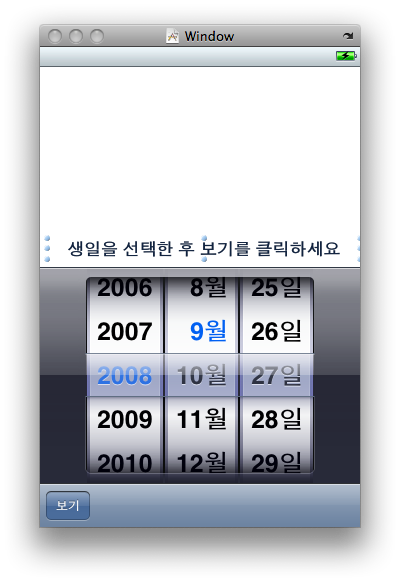
4. 사용자 인터페이스 생성1) DatePicker* Library 윈도우 사용자가 생일을 입력할 수 있도록 DatePicker를 설정합니다.
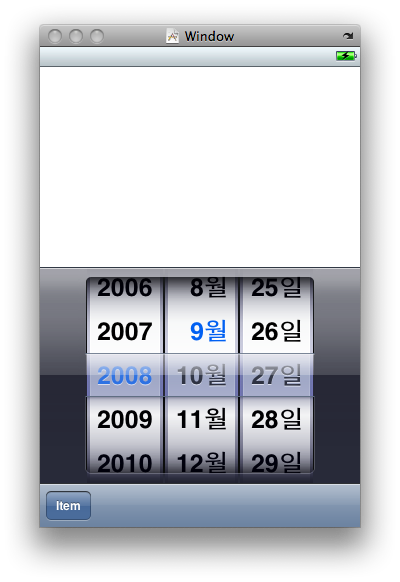
위와 같이 라이브러리 윈도우의 Cocoa Touch Plugin/Data Views에서 Date Picker를 클릭한 후에 드래그 하여 윈도우에 가져다 놓습니다. 아래가 윈도우에 위치한 모습니다.
* 속성 변경
위의 윈도우에서 DatePicker가 선택된 상태에서 속성창에서 좌측과 같이 설정합니다.
속성창이 안보이면 선택된 상태에서 단축키(⌘+1)를 이용합니다.
2) ToolBar
다시 라이브러리 윈도우의 Windows, Views & Bars 항목에서 좌측과 같은 Toolbar 아이콘을 드래그 하여 윈도우의 하단에 아래와 같이 배치합니다.
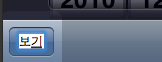
* 타이틀 변경
툴바의 Item 버튼을 더플클릭하면 좌측과 같이 입력 가능한 상태로 변경됩니다. '보기'라고 입력합니다.
3) 안내문구
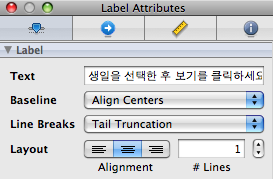
다시 라이브러리 윈도우의 Inputs & Values 항목에서 Label을 윈도우의 DatePicker 위로 드래그 해서 놓습니다.
* 속성 변경
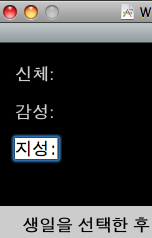
좌측과 같이 속성창에서 Text에 "생일을 선택한 후 보기를 클릭하세요" 라고 입력합니다.
하단의 Layout에서 정렬을 중앙 정렬로 놓습니다.
* 확인현재까지 윈도우의 모습은 아래와 같습니다.
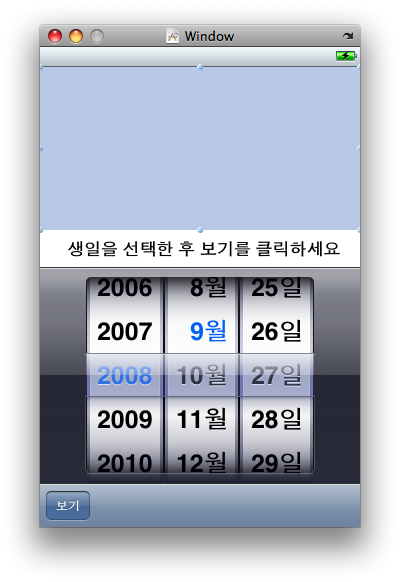
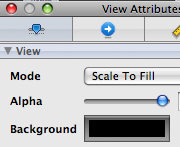
4) View
다시 라이브러리 윈도우의 Windows, Views & Bars 항목에서 좌측과 같은 View 아이콘을 드래그 하여 크기를 조절하여 윈도우의 상단에 아래와 같이 배치합니다.
* 배경 색상 변경
속성창의 Background의 색상선택 버튼을 클릭하여 좌측과 같이 검정색으로 설정합니다.
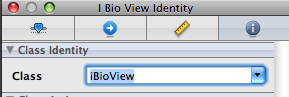
* 클래스 변경
Class에 Xcode에서 만들어 두었던 iBioView를 선택합니다.
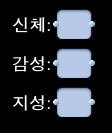
5) 제목, 텍스트 필드* 제목 라벨
라이브러리 윈도우에서 Label을 세번 드래그 해서 좌측과 같이 배치합니다.
라벨을 더블클릭하여 입력모드가 되면 각각 '신체:', '감성:', '지성:'으로 입력합니다.
* 텍스트 필드
라이브러리 윈도우에서 좌측과 같은 TextFiled도 똑같이 세번 드래그 해서 이전에 배치한 라벨의 옆에 아래와 같이 배치합니다.
* 속성 변경
⌘를 누른 상태에서 마우스로 클릭하여 좌측과 같이 세개의 텍스트 필드를 선택합니다. ⌘+1로 속성창을 엽니다.
사용자로 부터 입력에 반응하지 않기 위해 'User Interaction Eanbled'를 체크를 해제합니다.
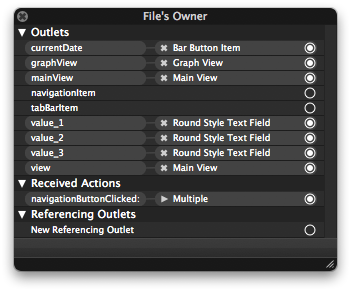
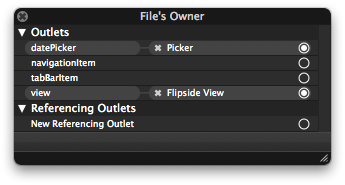
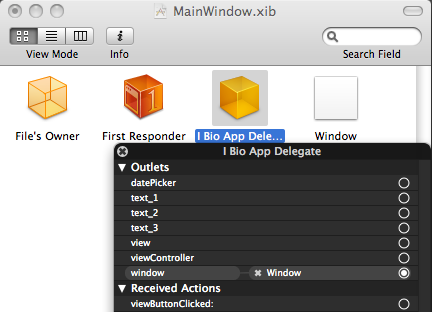
5. 연결MainWindow.xib 윈도우에서 I Bio App Delegate를 마우스로 우클릭합니다. 아래와 같이 iBioAppDelegate.h에서 생성해 놓은 Outlet들과 'viewButtonCliecked' Action이 있습니다. 이제 실제 오브젝트들과 연결해 보겠습니다.
1) Date Picker 연결
dataPicker 우측의 원 모양의 아이콘을 클릭하면 좌측과 같이 +로 모양이 변경됩니다. 이 상태에서 마우스 버튼을 클릭한 채로 아래와 같이 윈도우의 DatePicker에 드래그해서 놓습니다.
* 확인
완료되면 좌측과 같이 연결된 오브젝트가 표시되며, 우측의 원 모양 아이콘이 on으로 표시되어 연결되어 있슴을 알려 줍니다. x 모양의 아이콘을 클릭하면 연결이 해제됩니다.
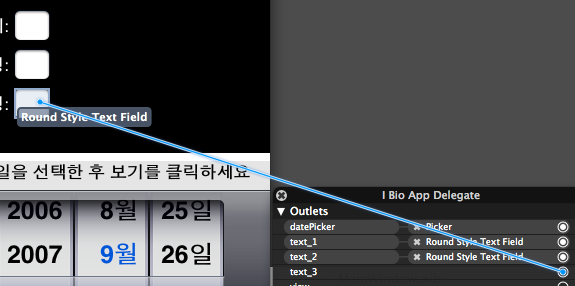
2) TextFiled 연결위와 같은 방법으로 아래와 같이 TextField를 text_1, text_2, text3과 위에서 부터 순서대로 연결합니다.
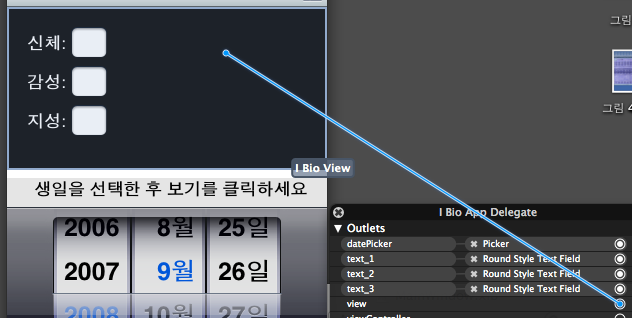
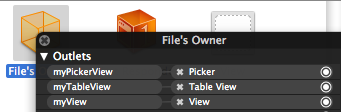
3) View 연결같은 방법으로 아래와 같이 view도 연결합니다.
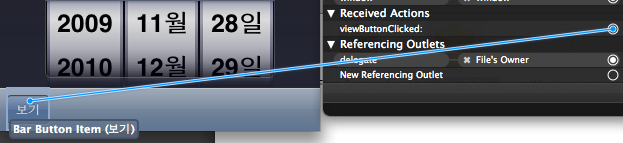
4) viewButtonClicked 메소드 연결사용자가 보기 버튼을 클릭하면 viewButtonClicked가 실행되도록 위와 같은 방법으로 viewButtonClicked를 툴바의 보기 버튼과 연결합니다.
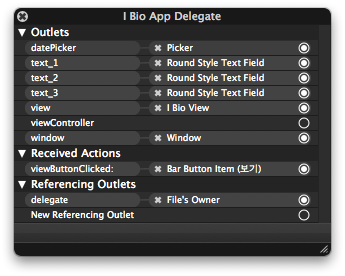
5) 연결 확인
좌측과 같이 모든 항목들이 정확하게 연결이 되어 있는 것을 확인합니다.
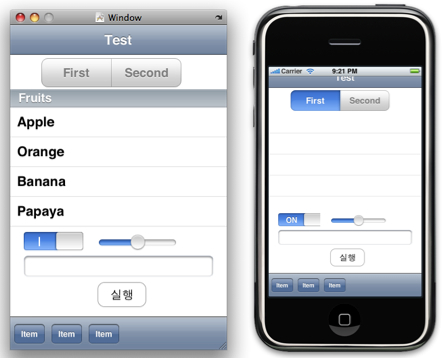
이제 모두 완료되었습니다. 저장 후에 빌드를 한후 실행하여 동작을 확인해 봅니다.
이상 간단하게 첫 아이폰 어플리케이션을 만들어 보았습니다. DatePicker도 동작과 설정이 조금 이상한 것 같고, 처음 갑작스레 만들어 본 것이라 맞는 방법인지 의심스럽습니다. 혹시 잘못된 부분이 있으면 댓글로 알려 주시면 감사하겠습니다.
기본 UI들이 멋있어서 맞출려면 디자인이나 이미지에 신경을 써야 할 것 같습니다. 나중에 조금 더 알아본 후에 월별로 출력하도록 수정하고 몇가지 변경해 본 후에 다시 한번 올려 보겠습니다.


 Control2.zip